Code Highlighting in Next.js 13
Top libraries
If we want to just simply display a piece of code on our page with nice syntax highlighting, there are two most popular libraries to chose from:

Both of them are build with pure CSS and JS so they can be used in any framework, including React and Next.js. But because they are framework agnostic and they are relatively old, it isn’t straightforward how to use them in modern frameworks.
What adds to the confusion is that most examples on the internet on how to use those libraries were written before Server Components were a thing. Proposed solutions are to include library in the client bundle and transform a piece of code to HTML on the client before or42k after component is rendered. Most wrapper libraries for React also work like that.
It turned out that code highlighting is a perfect candidate for a Server Component. We just import prismjs or highlight.js library on the server, transform a piece of code into HTML and send result HTML. Client doesn’t need to do anything, it just displays standard HTML with CSS.
Using Prism library
To use Prism in a server component in Next.js 13 we need three steps:
- Include `css` file for a colour theme of our choice.
- Import a core library and a module for a language our piece of code is written in.
- Transform a piece of code into HTML and include it in the component.
But first, we need to install Prism library as NPM package:
npm install prismjsInclude `css` file for a colour theme of our choice.
Good to know: External stylesheets must be directly imported from an npm package or downloaded and colocated with your codebase. You cannot use<link rel="stylesheet" />
Based on Next.js documentation we should import .css file directly from node_modules. All themes are located innode_modules/prismjs/themes/ so we can pick one and import it in our component:
import "prismjs/themes/prism-tomorrow.css";Import a core library and a module for a language our piece of code is written in
Core library is imported as a typical package:
import Prism from "prismjs";Core library includes support for HTML, CSS and JavaScript languages. For other languages we need to import additional module which extends core library with a support for given language. Innode_modules/prismjs/components/ folder are located modules for all supported languages. For example to add support for TypeScript we add following import:
import "prismjs/components/prism-typescript";Solution provided in Prims documentation throws an error.
const loadLanguages = require('prismjs/components/');
loadLanguages(['haml']);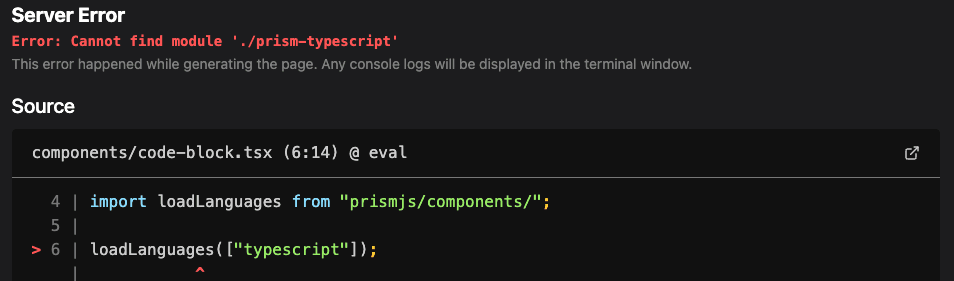
Transform a piece of code into HTML and include it in the component.
With a library in places we can transform any piece of code into HTML with Prism.highlight function and include the result in code element. Because we want to include raw HTML into the component we need to use dangerouslySetInnerHTML prop instead of using children. Additionally both pre and code elements need to have a class name based on a language so proper style is applied. Documentation only mentions adding class name to code element because the same class name is applied to pre element by Prism library when it is used on the client. On the server we need to add it manually.
Final implementation in TypeScript:
import Prism from "prismjs";
import "prismjs/themes/prism-tomorrow.css";
import "prismjs/components/prism-typescript";

export function CodeBlock({
  language,
  code,
}: {
  language: "css" | "html" | "javascript" | "typescript";
  code: string;
}) {
  const html = Prism.highlight(code, Prism.languages[language], language);
  const languageClassName = `language-${language}`;

  return (
    <pre className={languageClassName}>
      <code
        className={languageClassName}
        dangerouslySetInnerHTML={{ __html: html }}
      />
    </pre>
  );
}